Linear Momentum Lab Activity
Construction
First, you need to build your Newton car.
- Cut your piece of wood to about 7 inches x 4 inches x 1 inch. If you purchase your piece of wood at a hardware store, you generally can ask an employee at the store to cut the wood to the appropriate dimensions.
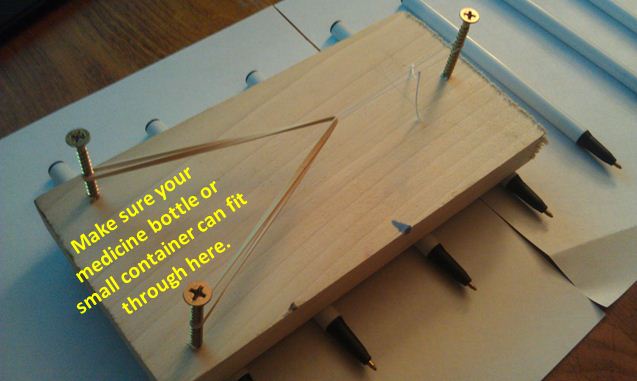
- Screw the three screws into the wood as shown in the picture below. Make sure that your medicine bottle or small container can easily slide between the two screws at the back of the car. See the picture below.
- Tie a few small loops using your string or thread (You will need at least 2 loops total, and each loop should be made from a piece of string about 5 inches in length.).
- Thread one rubber band through one string loop.
- Attach either end of the rubber band to the two screws on the back of the Newton car. See the picture below.
- Attach the string to the screw at the front of the car. See the picture below.
- Lay 12 to 15 round pens, pencils, straws, or dowel rods parallel (like railroad ties) 5 centimeters (about 2 inches) apart.
- Place the rear of the Newton car at one end of the track.
- Place a mark on your track where the rear of the car is located. This mark represents the initial position of your Newton car. You can use a piece of tape or a pencil to mark your cart's initial position. Note: In physics, we typically measure an object's location from its center. However, it is easier to maintain consistency in this activity if we measure from the rear of the car.
This is what your finished Newton car should look like when set up on its track.
